Event Management Purpose
The purpose of Event Management is to schedule any type event that you can schedule (i.e. training events, biometric events, lunch & learn events, etc.). Event management allows you to tailor each event according to your needs.
Events may be configured to be corporate-specific or location-specific. They may also depend on if people are in the health plan or not in the health plan.
The following Security Roles can access Event Management and all page information within this section of the Program Admin Guide:
- Enterprise Admin
- Location Admin
- Programs Admin
- Coach Manager
- Health Tech Manager
- Customer Service Level II
Event Management Overview
Event Management may be used to search for, view, add, and manage events within the system. Here, you can add a new event and manage it as well as update existing events.
To view and manage your events, click on Admin > Settings within dashboard. Next, select the Events Widget Tile. This tile will appear in red as shown below.
After clicking on the tile, you will be able to either add a new event or search for an existing event.

Searching for an Event
Use the Search options to enter filters and find an existing event. Events may be filtered by name, a date range, program, or location.
After entering your criteria, click on Search to view the search results below the configured search filters.
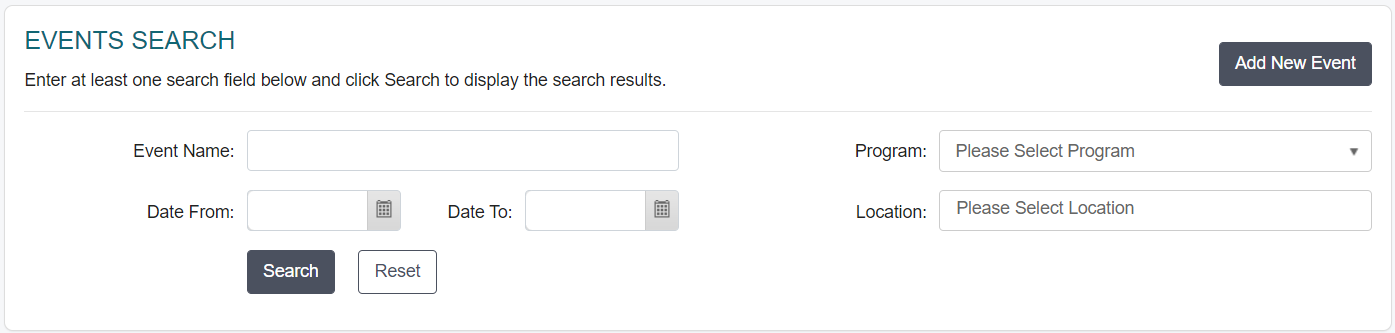
Depending on the User Role, events will be available in the displayed search results.
Adding a New Event
Click on Add New Event within the Events Management Screen to get started. The event form is divided into three sections: Event Details, Registration, and Visibility.
Items with an asterisk* are required to add the event. You will need to enter all the required fields in order to add the event.
Complete the following steps to add a new event to the system:
Step 1: Enter all of the required fields.
Step 2: Start and End are the start and end dates/times for the event. Type the date and time or use the Calendar/Clock Icons to select your dates and times.
Step 3: When selecting a Time Zone, you are selecting a time zone for the event. The system will adjust the time zone based on the user's time zone.
For example, if the event start time is set to 10:00 AM and the time zone is set to Eastern Time, then the event will start at 10:00 AM Eastern Time. Users in Central Time will see 9:00 AM, as it is adjusted to the user's time zone.
The default selected time zone in this form is the corporate time zone. This information can be found on the Preferences Tab in the Client Settings. For more information please see Preferences.
Step 4: The Location is where the event will be held at. For example, if the event will be held in Conference Room 2, then enter the conference room number and building address as the location. If it is held online, then this should be entered here.
Step 5: Add a Description of the event. This description should either inform users of what they need to do prior to attending the event and/or what will happen at the event.
For example, if it is a Biometric Screening event, then instructions should be added for individuals to be fasting before the event date.
Keep in mind that the user will receive a calendar invite upon registering for the event and this description information will be included in their calendar invite. However, updating the description will not update the user calendar invite.
Step 6: A Wellness Program must be selected to categorize your event based on the program.
For example, if you choose Biometric Screening as the wellness program, then the event will be categorized as a Biometric Screening.
This category appears in the event name when the user is viewing their upcoming events in the main dashboard as well.
Step 7: Registration is not required for an event. If users do not need to register for the event, continue to the next step. If users should register, please see the Registration Configuration section.
Step 8: Configure Visibility. This is who you want the event to be visible to in the system.
- Select a User Group: You may select a group that the event will be visible to such as an associate, spouse, contractor, etc. More than one group may be selected. If a group needs to be removed, click on the X to the right of the group name.
- Invited Locations: These are the locations you have access to. Use the menu to select each location. If a location needs to be removed, click on the X to the right of the location name. If the location cannot be found in the drop-down list, please refer to the Location Management page of this guide.
- Member Plan: Choose who the event will be visible to: In Plan, Out of Plan, or Everyone. Please refer User Management and Eligibility Data Management for more information.
- In Plan means they are participating in the health plan.
- Out of Plan means they are not participating in the health plan.
- Everyone includes health plan participants and non-participants.
Step 9: Click Save to finish.
After saving, depending on the selected options, you may see additional tabs for the event configuration. You may see a Time Blocks Tab and/or a User Documents Tab. For more information, please see the following pages of this guide:
If registration is required for the event, you may also see the Registered Users Tab. For more information please see this page: Registered Users.
Registration Configuration
The purpose of the Registration Required option within this form is to configure the registration requirements for events requiring users to register prior to attending the event.
This option can be used for on-site events such as biometric screenings where registration is required. It can also be used for Lunch and Learn or any other event that you would like to track registration or award points automatically upon attending the events.
The Registration Required option does not need to be enabled or configured if attendees do not have to register and can be left unchecked.
If your event requires registration, check the box next to Registration Required. Additional configuration options become available on the form after this option has been checked (enabled) and are explained below:
Registration End Date
An end date may be configured for the registration if you have a limited number of slots, people, licenses, etc.
The registration end date is based on the time zone selected at the top of the form for adding events (see the Adding an Event section for more information).
When an end date is configured, users will not be able to register for the event through the configured end date. If a user attempts to register after the date, they will not be able to do so.
When the Registration End Date passes, the system will show an Event Closed status to the user when logged into the system.
Registration Limit
It is possible to configure a registration limit. Two options are available: Registration Limit and No Limit.
Registration Limit - When configured, only the defined number of people can register for the event. To set a limit, enter the number value in the Registration Limit field.
- No Limit - When checked, there is no limit to the number of people who can register for the event.
When the event hits the max number of registered users, it will show an "Event is Full" Message to the users. Admins are able to open more slots for the event if needed.
If a registration limit and time blocks have been configured for the event, the time block will take priority. Once the time block is filled, the system will close the event. If the time block is not filled, then the registration will go until the time block is filled.
If you do not have a time block configured for the event, then the registration limit will take priority. Once the limit is filled, the event will be closed.
Require Consent
This option is only required if electronic consent must be provided to the event. If consent is required, check the box to enable this option. Otherwise, leave it unchecked.
This is typically required when you have an on-site biometric screening or when you have an on-site coaching.
Award Points
When people attend the event, the system will automatically award points based on the attendee. If points should be awarded, check the box to enable this option. Otherwise, leave this option unchecked.
You will need to choose a program from the Health Points drop-down menu for awarding the points. Programs displayed here are for the given year.
Updating an Event
Once an event has been added, you can search for the event, view current settings, and make changes if needed. Use the Search Filters to locate the event and then click on the Pencil Icon in the list to access the event details.

The Event Details Tab will be selected by default. Additional tabs will be present after an event has been added in the system. You will need to click on another tab to configure its information.
Remember to click Save once changes have been made to the event.
Troubleshooting FAQ
What happens if I select an Eastern time zone and my people are in another time zone?
What happens if I exceeded my registered number of people?
Can people access the event directly from the URL?
When will people get awarded points?
What if I do not have award points?
What if I do not have registration required?
What happens if I select an Eastern time zone and my people are in another time zone?
The system will adjust the time zone based on the time zone where they are located.
What happens if I exceeded my registered number of people?
The event will automatically close after you have met the set number of people for event registration.
Once the registration limit has been reached, the event will show as closed.
It will no longer be available for users to register.
Can people access the event directly from the URL?
If they have the specific permission to do that, yes they can.
If they do not, they will not have access to the event via the URL.
When will people get awarded points?
People are awarded points when they have attended the event.
The admin will check them in within the system and then the points will be awarded.
The user will get notified in the notifications section and they will receive the points.
What if I do not have award points?
Then the system will not do anything regarding awarding points.
What if I do not have registration required?
If you do not have registration required, you cannot track who is attending the event.
The registration will be open to everyone.